
If you are a small business owner, you may or may not have the skillset to build an accessible website from scratch. If learned, this simple skill can save you a whole lot of money that you can invest elsewhere.
WordPress is one of the most popular platforms to build websites, and 43% of websites are built on this platform globally. With WordPress’ visual components, anyone can build a website on this platform. And, there are many tutorials that can help you in each step of this process.
But what about accessibility?
Building accessibility into the web development process right from the design phase is essential to avoid future rework. This includes starting from the branding and progressing to sketching out the navigation and page structure even before starting on the development. It would increase your site’s outreach as everyone, including people with disabilities, can also access your website’s information.
In this guide, we’ll discuss all the steps that you should consider for building an accessible WordPress website. So, let’s get started.
Table of Contents
Things to Consider while building an accessible WordPress website
Part 1: Accessible WordPress Themes
There are many free accessibility ready themes available and even some paid ones on Theme Forest.
First, what is a Theme?
A WordPress theme is a set of files compiled together that include page templates written in PHP, CSS, and some Javascript. It is a ready to use tool that defines the layout and design of your website. Themes set the appearance of the site that includes the page layout, color palette, typography, and other design elements like buttons and menus.
When you first install WordPress there is a default theme that comes with it. You can change the theme to meet your needs.
Themes and Accessibility
Choosing the right theme will make your website easier to navigate, look good and provide a good user experience for your visitors.
It’s that much more important when it comes to Accessibility to choose the right theme. We know that a theme outlines markup, navigation, layout and design elements. An accessibility ready theme is responsible for making these accessible already so you don’t have to hand code it.
Some items to look out for when selecting an accessibility theme-
- Skip Links – Skip links make it easy for screen readers to jump straight to the main content of the website without having to navigate through all the menu items to get to it.
You can test this by hitting the tab key on your keyboard.
A link should appear at the top left hand corner of the webpage right under the address toolbar that says “Skip to main navigation” or something similar.

- Menu Navigation – Ensure that all the menu and submenu items expand and collapse with a keyboard and screen reader, and that you are able to traverse through all interactive elements before getting to the main content.
You should also be able to access links, buttons, and form fields with a keyboard only.
- Color Contrast – WCAG 2.0 requires a minimum color contrast of 4.5:1 for normal text and 3:1 for large text. WCAG 2.1 requires at least 3:1 for graphics.
- Visible Focus – Do all interactive elements like menu items, buttons, and links have a visible focus indicator around it?
How to find Accessible Themes?
- Navigate to wordpress.org
- Select Themes
- Select the Feature Filter option for the drop down menu and apply the filter

We would suggest that you do your due diligence and research each of the themes by visiting the theme homepage and check for the features mentioned above.
You could always stress test them by installing the themes and trying to navigate with a keyboard or a screen reader to see if they are actually accessible. A little bit of research will go a long way.
We are big fans of WebMan Design by Oliver Juhas who makes EU compliant Accessible themes.
Some of his popular themes are:
- Angelica– Online shops
- Cindy– Local Government websites
- Polyclinic – Medical Service Provider
- Bjork– Premium business portfolio
- Icelander– Premium business portfolio
- Eimear – eCommerce
- Monument Valley – Business portfolio
Part 2 : Create an accessible WordPress theme
WordPress gives you the option of building an accessible theme on your own.
If you are a little more confident about your technical skills, you can go on to build an accessible theme.
For most of our clients who require custom builds, we use Underscores as a starter theme and build upon it to have more control over the page templates.
Some other good themes to customize are Astra, Genesis and GeneratePress.
Once you select your base theme to modify you can follow the following steps to build upon it:
- Select the applicable accessibility standards you want to meet. Are you in the EU, US, Canada? Different countries have different regulations. When in doubt which laws you have to adhere to, always refer to the latest standard of WCAG – currently WCAG 2.1.
- WordPress also has a set of dedicated guidelines on building accessibility themes. We recommend you read this list to understand the process of building accessible themes.
Here is a non-exhaustive checklist to look out for when building your accessible wordpress site:
- Alt text
- Links Descriptions
- Typography
- Color Contrast
- Semantic Headings
- Skip Links
- Use of Native HTML elements
- Visible Focus
- Tabindex
- Keyboard Accessible Navigation
Adding alternative text for media files
Most websites these days are filled with media-rich, non-textual content. While we understand that this is a great way to engage your website visitors, this could be a reason why people with disabilities are unable to access the information on your site.
People with disabilities use a screen reader to access the information on websites. A screen reader can only depict text content and it cannot describe the images to the visitors. Similarly, if you are starting a podcast, someone with hearing disabilities cannot access it.
One of the best accessibility practices that can simplify this situation is adding text alternatives, wherever you use images or other media files. It will work as a descriptive text to the image you are using and guide people with disabilities regarding the information underneath.
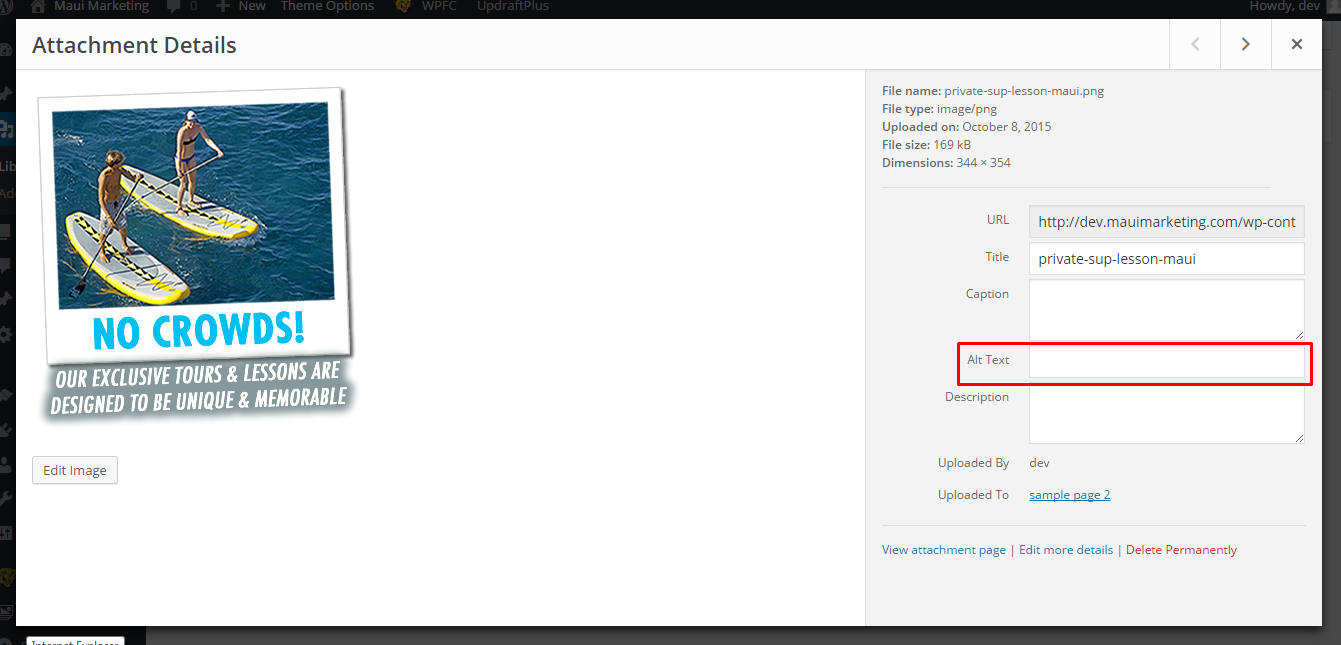
Adding alt text to a WordPress site is pretty easy, as you can see in the above image, there is a specific place for adding alt text, for each image you upload. So, there should be no difficulties in doing this right.
Similarly, if you are planning to start a podcast, it is ideal that you add transcripts so that a user who is unable to access the audio can still consume the information you are sharing.
Add link descriptions
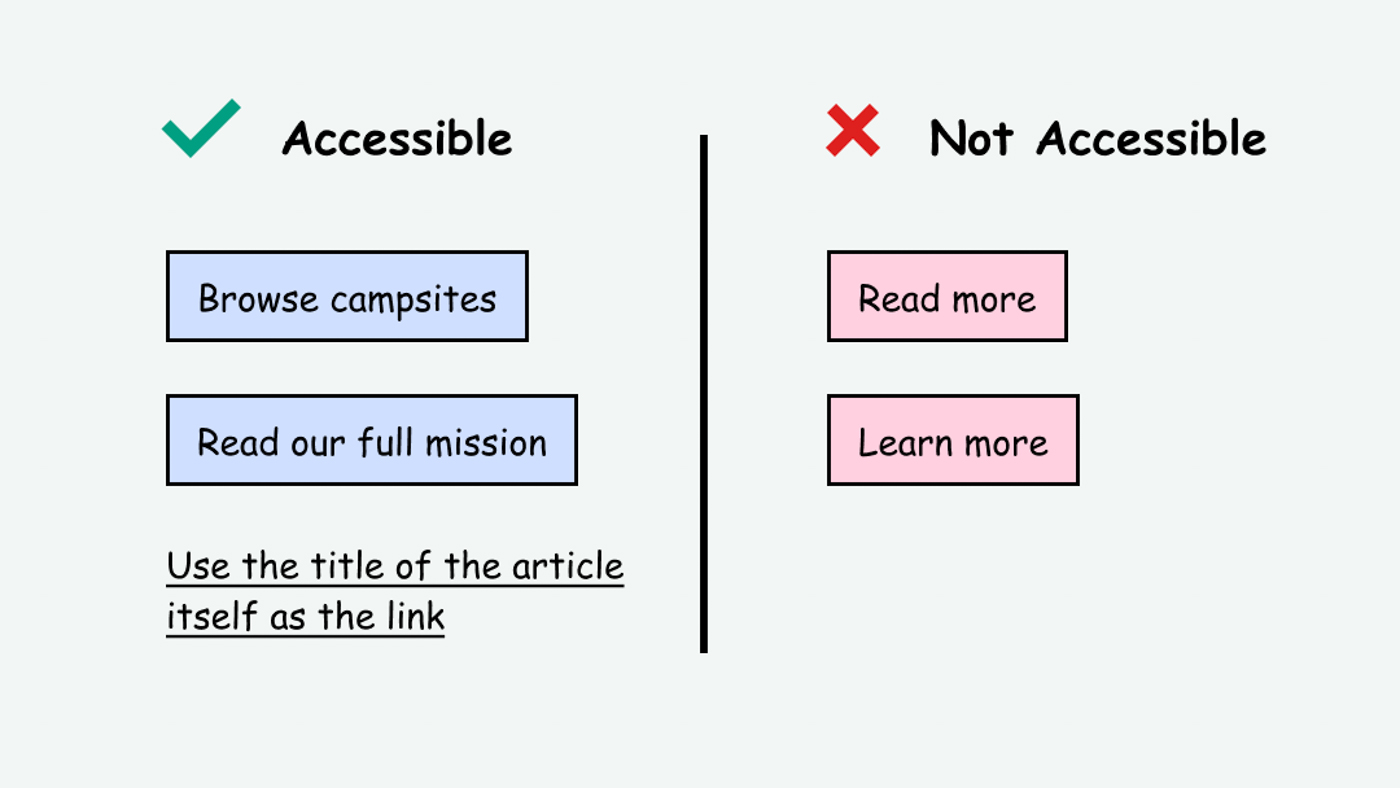
Assistive technologies like screen readers jump from one link to another to navigate across your website. So, to make sure that the users are reaching the right web pages, it is recommended to add appropriate link text and descriptions.
When using a Call-to-action, don’t use generic link texts like “Add link descriptions ” or “Find out more”. Replace these CTAs with “Click here to read about…” or something that conveys the purpose of the CTA to people with disabilities.
Typography
Size 16px is the recommended font size for the body text, also ensuring that the text can be zoomed to 200% without being distorted.
Fonts that belong to the Sans Serif family are recommended for readability, and here are some of the fonts that we recommend:
| FONT NAME | COMMENTS |
| Verdana | Commonly found font designed by Microsoft |
| Lucida Sans | Large x-height making it readable at all sizes |
| Tahoma | Another Microsoft font |
| Helvetica | Traditionally a print font, it is available on most Operating Systems by default |
| Arial | Similar to Helvetica |
| Calibri | Commonly found font in Windows with good distinct characters |
Pro tip: When using CSS, set the font size in relative terms (%, em). This will allow fonts to be displayed relative to a particular device that it is being displayed on.
Semantic Headings
A structured heading order benefits screen readers, visual users and Google. Google? Yes, it helps in SEO when you have a semantic heading structure. Read this article on SEO and Accessibility to learn more about the relationship between the two.
Heading best practices:
- Have one H1 per page
- No more than two H2
Follow a logical heading order without skipping heading levels.
A good heading structure would look like the following
<H1>
<H2>
<H3>
<H3>
<H4>
Skip Links
As we mentioned in the features to look out for when selecting WordPress themes, skip links are necessary for screen readers to bypass long chunks of navigation and go straight to the main content on the page.
They are usually controlled by CSS and can either be hidden or made permanently visible above the header. In most cases, they are hidden by CSS.
This is how the HTML would look like –
<header>
<a href=”#main” class=”skip”>Skip to main content</a>
</header>
<main id=”main”>
A main ID is needed to link it with an anchor.
Because we had a skip class in the HTML, we will be able to hide it with CSS.
.skip {
  position: absolute;
  left: -10000px;
  top: auto;
  width: 1px;
  height: 1px;
  overflow: hidden;
}
The link needs to be focused when it is visible, and this is controlled by CSS as well
.skip:focus {
    position: static;
    width: auto;
    height: auto;
}
Use of Native HTML elements
If you use native HTML elements the way they are meant to be used, you will have a perfectly accessible website and won’t even need to use ARIA.
This is because native HTML elements are accessible by default especially <button>
- They have keyboard focus
- The role helps screen readers understand the function
- They can be activated with Enter or Space keys
Keyboard Accessible Navigation
A user should be able to navigate through a page by using Tab to move forward and Shift + Tab to go backward.
Enter and Space keys should activate the element.
All interactive elements should be navigable and activated with the keyboard. Some interactive elements are:
- Combo boxes
- Radio buttons
- Checkboxes
- Text fields
- Buttons
- Links
Visible Focus
Not all users use screen readers, but use a keyboard only to navigate a page. When they do, there needs to be a visible focus indicator around an interactive element.
You can use the syntax :focus-visible to apply a focus outline.
Tabindex
Tabindex is very useful in setting the order of the focus as a user traverses through the page using the tab key.
When and How to use Tabindex values
tabindex = “-1”
This value doesn’t put the element on the tab order of the page.
tabindex = “0”
Will make an element focusable.
Tabindex > “0”
Any value greater than 0 is not recommended as it makes it difficult for users of assistive technology to navigate and interact with the page content.
For example, tabindex = “3” means that the element will be focused in the order defined by the number value. So tabindex = “1” and tabindex = “2” will have to be focused in order before arriving at tabindex =”3”.
These are only scratching the surface of WordPress accessibility, but it’s a good place to begin. The use of HTML and CSS best practices will help solidify a base for good user experience and an accessible website.
Part 3: Accessibility testing and reporting
Accessibility testing should be performed at every stage of building a website and before moving onto the next process. Use a free, automated Chrome extension called LERA to :
- Test the accessibility status of your website against the WCAG guidelines
- Experience automated testing and reporting of the accessibility issues and fixes in a downloadable report
- Test as many URLs as you like to ensure that the entire website is accessible
Final Thoughts
Building an accessible website on WordPress is not difficult at all as you don’t need excessive technical skills to use this platform. If you select a good accessible theme and use it as intended out of the box without modifying it too much, you will be set up with a good accessible website.
If you require custom accessibility compliant websites in WordPress you can reach out to us at info@advancedbytez.com.
Happy Coding.
